Posted by · 4 Comments
Our host, Tracy Toth, shares her recipe for making homemade sauerkraut in the first installment of this two-part webisode. We expect to post part two after the cabbage fermentation process concludes.
Posted by · 4 Comments
Our host, Tracy Toth, shares her recipe for making homemade sauerkraut in the first installment of this two-part webisode. We expect to post part two after the cabbage fermentation process concludes.
Posted by · 2 Comments
Let’s do a little math. We ordered a quarter-pound packet of Waltham butternut seeds, knowing that would more than cover us for planting in the spring (we had some seed left from last year) and ended up planting only half that amount. The packet was $8.95.
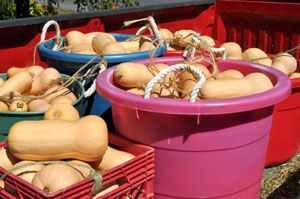
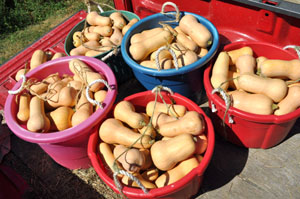 We are in the midst of harvesting the butternuts now. This load is the first picking and represents about 500 pounds. Altogether? We’ll get about 1500 pounds of butternut squash out of the less-than-half packet of seed that was planted.
The Waltham variety is an extremely popular variety — not only with us but with the pollinators. (Remember the blog entry about the bees buzzing in the blossoms?) Its flavor is delicious, it keeps well (we’ll store ours through the winter in our basement, which stays cool and dry), and the plants are consistent and reliable.
So, it’s inexpensive + proven + tasty + reliable + bountiful = A winner!
Posted by · 1 Comment
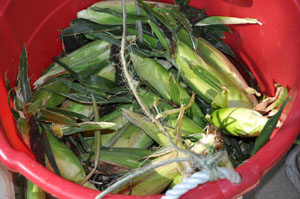 We bade a fond farewell to our sweet corn a week ago.
Nothing, and I mean nothing, beats the taste of a freshly picked ear of sweet corn. 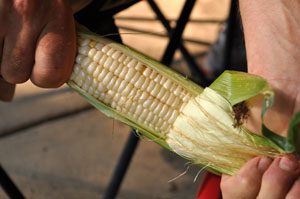 My husband always plants the old standby “Silver Queen.” It’s been a popular variety with farmers for decades and has a maturity of 92 days. This year, we also planted “Bodacious” which has a 75-day maturity and “Delectable” with an 84-day maturity. The different days to maturity as well as staggered plantings, allow for a sweet corn harvest over several summer weeks if you’re a savvy planter!
I’ve frozen corn in the past by cutting it from the cob, blanching it, and securing in freezer bags. I’ve even canned it—which is fairly time-consuming because of the processing time in the pressure canner. The best way to enjoy it, though, is right out of your garden, right out of the pot, and 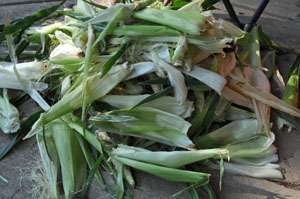 right off the cob!
Parting is such sweet sorrow…
Posted by · 1 Comment
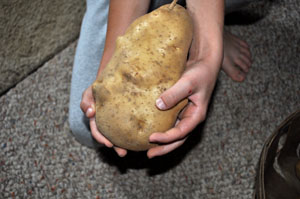 From year to year we have “volunteer” plants come up. They surprise us both with their locale (maybe an errant seed dropped by a bird) and species that it appears has wintered over.
This year, among the volunteer crop, was this particular Superior potato plant. 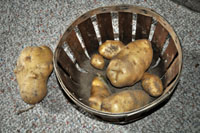 The potatoes in the basket would be a somewhat “normal” yield for a plant but what makes this extraordinary is the fact that the whopper that Natalie is holding was also produced by the same plant!
Other volunteer seeds have produced sunflowers, tomatoes, various annual flowers, and a variety of squash/pumpkin/gourds. They’re always a treat to find in the garden because they’ll be slightly ahead in growth of what you’ve planted by seed that year.
When we first moved in, I had David rip up a large area at the back of the house for my flower beds. This year will mark the first year we did not have a volunteer tomato crop magically appearing there, in and amongst the flowers. He tended to think it could’ve been the site of an outhouse (sorry for those who can’t “stomach” the thought of life before plumbing). The more I think about it, he’s probably right.
As far as the gigantic potato-bearing plant goes? A chunk of potato was, inadvertently, left in the ground from last year and just sprouted. And, boy, did it sprout?!
Posted by · Leave a Comment
Slipping Tomato Skins
Many cooked tomato canning recipes call for tomatoes to be “washed, cored, peeled and chopped” (in fact, I can’t think of one right off the bat that doesn’t). The simplest way to peel a tomato is just to “slip the skin.”
Here are the simple steps:
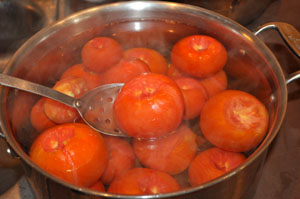
The green tomato in the batch is an heirloom variety and RIPE! 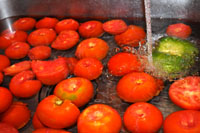 I needed it to fill out the weight of the tomatoes required in my barbeque sauce recipe. No one will ever know; shhhhh! Don’t tell…
Posted by · Leave a Comment
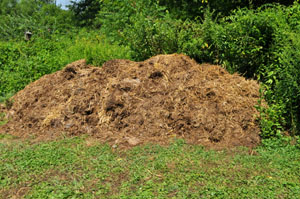 This very brown pile is responsible for making our corn very happy.
You see, corn requires heavy amounts of nitrogen in order to yield well. The manure/straw bedding that is taken from the sheep stalls is loaded with nitrogen, phosphorus, and potassium — the main elements essential for healthy plant growth. (Raw manure, containing ammonium-N, which will dissipate when exposed to the heat and air of the outdoors, is applied to the soil early in the Spring.)
The pile in the picture came from one very large stall that wasn’t cleaned along with the others a few months ago—and had over-wintered. David estimated its weight at 4-5 tons! It’s a very difficult job breaking the mass apart in the stalls, separating it into wagon loads and taking it to the compost area away from the barn. And to say the ammonia odor is “strong” is an understatement!! However, the contents are rich in “plant food” and feeds the garden soil that is constantly at work to “feed” and nourish the plants.
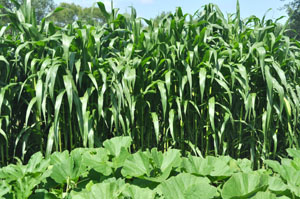
The remants of the pile will compost itself and shrink down. We’ll use it in the Fall or even next Spring. Right now? The corn’s pretty happy—if a vegetable can be “happy”.
Posted by · Leave a Comment
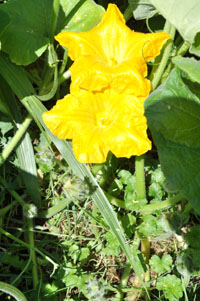 I thought it would be nice to show a picture of the butternut squashblossoms which are practically at peak color and size right now.
When taking the photo I was met with the most pleasant surprise: bzzzzzzzz.
The entire section of butternut squash, which, at this point in the summer has just about taken over the entire garden, was “buzzing.” I leaned in to hold the giant green leaves aside in order to snap pictures of one of the orange/golden flowers. To my utter surprise and delight, each flower had at least 2 bumblebees inside—and there were so many flowers, I couldn’t count them all?!
As a vegetable gardener, you can be surprised on a daily basis; I can honestly say, I’d never seen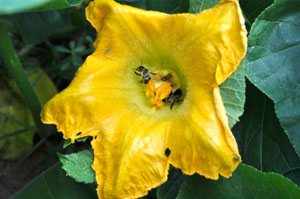 (or heard) anything like this in the garden before. It would’ve been so easy to have never noticed this little “dance of nature” going on…but I’m so glad to have stumbled upon it.
Posted by · Leave a Comment
We gather more information about lettuce and hydroponics.
Posted by · Leave a Comment
Posted by · 2 Comments
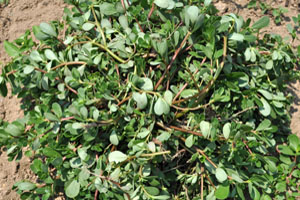 I didn’t always know Purslane, mind you. We met after I married.
David was away on a flight assignment with the National Guard (mid-July, as I recall) and I was left tending our veggie garden for a few days. This was my first summer doing this– I was on maternity leave from flying and halfway through my pregnancy.
I thought it’d be great to show David, upon his return, how I tidied up the garden…and proceeded to weed every row. The work was tedious (as weeding usually is) and my protruding belly and the hot summer weather made for an uncomfortable experience. I pushed through, though, and ended up with mounds and mounds of this succulent “weed” which, to my great surprise was very easy to pull, thanks to a recent rain. It was really productive work—it almost looked as though I’d taken a vacuum cleaner between the rows and cleaned the paths!
David was amazed at my handiwork and surprised me with an early birthday dinner at a restaurant in Madison, Wisconsin known for serving only local and seasonal fare (a rarity 11 years ago). Imagine my surprise when the salad course came and there, alone on the little china plate, was a heaping helping of….purslane. I remember looking up at him, quizzically, and saying “Are they kidding??” Nope. Not kidding.
Our Pennsylvania neighbors always ask for a bowl of purslane from the garden. They’ve been eating it for years. I’m always happy to oblige; the supply is endless. Me? I’m happy to stick with the mesclun mix we plant. But I recall that trip to the Wisconsin restaurant every year about this time—when it’s time to “tidy up” the rows.